Cover Recording of My Eyes From Dr. Horrible
One really excellent way to learn to record music is to study what the pros are doing. By breaking down a popular song and analyzing the parts and how everything fits together, you can learn an amazing amount about music production and recording. If you can then manage to re-create the song from scratch, you get double or triple the benefit of that learning. If you can make it sound very close to the original, you know you’ve really cracked the code (well, for that type of song at least).
In order to demonstrate this concept, we used a song from Joss Whedon’s Dr. Horrible’s Sing-Along Blog. The song is called My Eyes (sometimes referred to as “On The Rise”), Music by Jed Whedon; Lyrics by Maurissa Tancharoen, Jed Whedon, and Joss Whedon.
Here is how we did it:
1. What Instruments Were Used?
This song was a bit of challenge in that there were a lot of different instruments used in the original recording, such as classical guitars, bass, percussion, full drum kit, English horn, string section, piano, harp, and of course, vocals.
2. Try to Use The Same Instruments
This is where virtual instruments come in very handy. If I had a bunch of classical musicians in my hip pocket, I would have used them. But since I don’t, I did the next best thing. I used virtual instruments controlled via MIDI. I’m also not adept at playing every instrument, so using MIDI and a keyboard to play the notes of virtual instruments was a giant help.

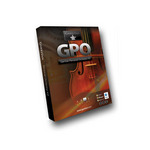
The nylon-string classical guitars at the beginning I COULD have played, though the part is quite intricate and fast, so I would have sworn a lot and done dozens of takes. Instead, I used a modeled virtual guitar sound from my favorite virtual instrument, Omnisphere. The string section also came from Omnisphere. For the piano I used a free plugin called 4Front Piano. For percussion I played a hand drum with a brush on one track and a virtual frame drum from a drum program called StormDrum. The English horn came from a program called Garritan Personal Orchestra. The drum kit also came from StormDrum. I played a real bass guitar, and of course the vocals were real.
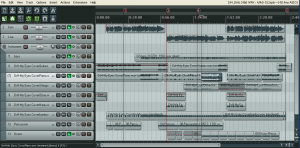
3. Recording Everything
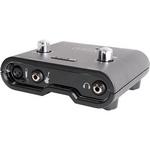
I used Reaper recording software on my computer. The bass was recorded plugged into a USB interface called a Line 6 Gear Box (which models electric bass and guitar amps…very nifty!). I also used a Rode NT2-A microphone plugged into a usb audio interface called Focusrite Scarlett 2i2 the vocals.
I recorded the guitar parts with a keyboard (using a virtual guitar here, remember?), creating a MIDI track in Reaper.
I then edited the notes in the midi track for proper timing and getting rid of wrong notes, etc. I then copied that MIDI part and put it onto a second track, using the MIDI tools to “humanize” the note timing. This difference allowed me to pan each MIDI part (I also used a slightly different guitar patch for the second track) left and right for stereo guitars.
Next I played the piano parts a few bars at a time, since I’m not really a piano player. Listening to the original recording, I picked out the notes and chords and basically “drew” them onto the MIDI grid until it sounded right.
I did the same thing with the percussion, drums, strings and English horn. Then I played the bass part the “normal way”:). After that, I sand my part and my wife, Lisa, sang her part on her track. when the thing was all recorded, we had 12 tracks of audio all playing together.
4. Mix It Down
After editing certain tracks (getting p-pops out of the vocal tracks, adjusting volume dynamics and EQ, etc, I adjusted the individual volume controls for each track until everything sounded nice together, then I mixed it all down (called rendering in Reaper) to a single stereo file. I then opened that stereo file in Adobe Audition for basic mastering. In Audition I trimmed the extra gits off the beginning and end of the file, and ensured it started and ended in total silence. Then I used some compression to even out and optimize loudness for the final polishing.
That’s it, in a nutshell.
All this was done on my computer in my house, in a regular bedroom that is not treated or sound-proofed in any way. If you’d like to learn how to do this type of thing also, check out all the free articles and videos at Home Brew Audio, as well as our video tutorial courses, and just all-in-all your home recording one-stop shop.
Good luck and don’t hesitate to ask any questions about this article right here in the comments.
Cheers,
Ken
Free videos from “The Newbies Guide to Audio Recording Awesomeness”
