Vocal Compression Using Reaper’s ReaComp Effect Plugin
In this audio recording tutorial video published by AudioTuts+, I show you how to compress a vocal track using the compressor plugin effect, ReaComp, that comes with Reaper audio recording software. If you’d like a refresher on what the compression effect is for, see our article: What Does Compression Mean In Audio Recording?
In a nutshell though, “compression” in audio recording helps you even out the volume/loudness levels. This is helpful on, say, a vocal track in music because it makes it easier to hear and understand the voice all the way through a song.
Without compression to even out the volume level, you wouldn’t be able to hear a voice when it got quiet and low. It would get buried under the music, which would be too loud in comparison. Likewise, when a singer is really belting, it could be too loud compared to the music. So compression keeps the volume under control by keeping the levels much more even.
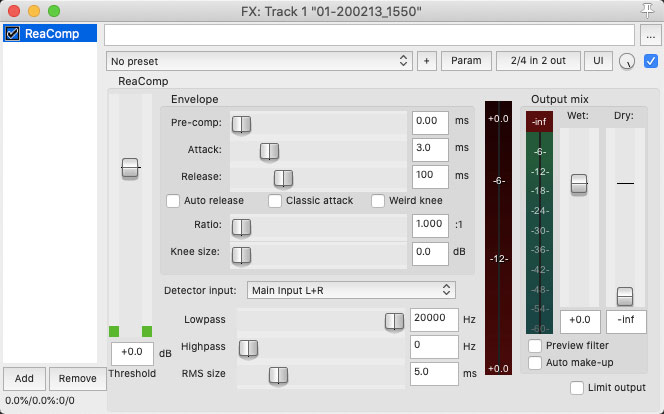
In this video, I show you how to place ReaComp on a vocal track in Reaper (my dulcet tones doing a bit of singing). Then I walk you through the settings screen and explain the main controls and meters so you can see how the voice is affected by them. Then I show you how to set the starting levels for the threshold, ratio, and attack/release settings. You can then both see and hear how compression affects the vocal track.

The tutorial video was published here. I encourage you to check out the AudioTuts+ site because it has a lot of resources on audio recording that you will find very useful. But if you just want to watch the video, check it out below. Enjoy!

[…] To find out more about what compression is, see my posts What Does Compression Mean In Audio Recording? and Vocal Compression Using Reaper’s ReaComp Effect Plugin. […]
[…] There are all kinds of settings on a compressor that are better discussed in other articles. For a good idea of what those are, see my article and video – Vocal Compression Using Reaper’s ReaComp Effect Plugin. […]
[…] only applies its effect when it is told to by the incoming audio. For a review on this see my post Vocal Compression Using Reaper's ReaComp Effect Plugin. For example, it will compress only if and when the incoming audio gets louder than a certain […]
[…] Yes, I did say that. A compressor has many settings that can be confusing, such as threshold, attack time, release time, etc. You can find out what those mean in my post and video here: Vocal Compression Using Reaper’s ReaComp Effect Plugin. […]
Awesome tutorial. Thank you!
You’re welcome. Thanks for the kind words!
Thanks for taking the time to make this! I am new to reaper and have little understanding of how to use compression but this definitely gives me more confidence with my mixing!
Glad it helped!
Hi there, from Harrogate UK. Nicely demystified it. Thank you
Thanks! And you’re welcome :-).