How To Set Up A Home Recording Studio: Part 4 – Software
This is part 4 in our How to Build a Home Recording Studio series that shows you how to set up a computer-based studio capable of recording pro-quality audio. In part 3, we talked about microphones and sound cards and other type of interfaces. Today, let’s talk about audio software.
The Software
I left this part until part 4 because if you get everything else right, the software is probably the least important part of the equation. There are tons of programs to choose from, so it can be tough to figure out what you should get and how much you should pay. My suggestions will be based on my experience and will enable you to sound professional even with a limited budget.
Audacity

For voice-over stuff (including podcasts, audiobooks, video narrations, etc.), you can probably do most (if not all) you need to do with the free program called Audacity, which you can download from the web and start using right now. For a free product, Audacity is pretty amazing, capable of just about any basic audio recording and editing function, including multi-track recording.
But it is a bit hard to use, not very intuitive, and some of the editing tools aren’t super great. Also, you can’t use MIDI or virtual instrument plugins in Audacity. So if you are mainly recording music, Audacity probably isn’t the bests choice.
By the way, our “recording 101” course called The Newbies Guide to Audio Recording Awesomeness – Part 1” uses Audacity to teach you the basics of recording. Part 2 of the course will use Reaper.
Reaper
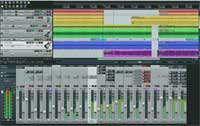
I always recommend Reaper, by Cockos, which is incredibly powerful. I use it for everything, even my music studio. Make no mistake, this is professional software that rivals programs 10 times more expensive. From basic voice-over recording to full-blown multi-track music recording, including MIDI, virtual instruments, etc., Reaper can do it all. I’ve recorded 6 full albums (for Raven Boy Music) using it, and have several more in-work.
I mention this next bit only because I made such a big deal about noise reduction in this series. Even though it isn’t labeled as such, there is a tool in Reaper that is one of the best noise reduction tools available, called ReaFIR (FIR=finite impulse response). It actually works better for reducing noise than many programs designed for the purpose! And ReaFIR is just one of dozens of effects that come bundled with Reaper. That’s just a bonus tip;). I put up a post with a video on ReaFIR here.
Cockos also has a “Fair Pricing” scheme for Reaper that is unheard of in any kind of business. Unless or until you start making on the order of 20 grand per year with the audio you produce using Reaper, you don’t have to buy the commercial license, which costs $225. You can use the “discounted” license, which is only $60. And the software is the same!
Also, the 30 day trial is a completely un-crippled, full version of the software – the exact same as the commercial license version – and will never stop working. Though after 30 days you’ll start getting pop-ups reminding you that the product is not free. They understand that it sometimes takes more than 30 days to evaluate audio software, especially if you’re just getting into recording. All of this is on the honor system. Who does that? Well, I can’t think of any other business off-hand. I recommend Reaper all the way.
Adobe Audition
I use Adobe Audition along side Reaper to edit individual files and final project renders (aka mix-downs). Audition started out as just an audio editor called Cool Edit back in the 90s. It didn’t do multi-track recording, but rather focused on making changes to a single audio file.
You could analyze, filter, and apply treatments by the dozens – multiple kinds of EQ, compression, reverb, echo, noise reduction, clicks-and-pops reduction (really helps with recordings transferred from old LPs), and tons of other things. These edits were “destructive,” which doesn’t mean “bad.” It simply means that once you apply them, they affect the underlying file.
Cool Edit Pro added the ability to do multi-track recording, was bought by Adobe and had its name changed to Audition. Now you can pretty much do it all with Audition – destructive AND non-destructive editing, MIDI, virtual instruments, the works. It, like Reaper, is decidedly professional software. Though it used to be a stand-alone program (and you can still sometimes get DVDs on Amazon for older versions), it’s now part of the Adobe Creative Cloud.
Some words about the editing thing
I use Adobe Audition strictly as an editor – I usually don’t record audio with it. Though you can do most things, including editing (non-destructive), with Reaper, I prefer to finish every project with a full-fledged editing program like Audition or Sound Forge (Audacity can be used as an external editor with Reaper as well).
These programs have more specialized tools for really getting down into the bits (literally) of an audio file, as well as music mastering and CD authoring, and some things simply cannot be done in Reaper such as redrawing a waveform with a pencil tool to get rid of a glitch in the audio.
But it isn’t only that. There is a different mindset to working on the final audio from a project. It’s like taking off the recording and mixing hat and putting on the final editing and mastering hat. To me it is a workflow thing.
For example, let’s say you had several tracks of audio in a Reaper project. in voice-over work you might have the voice on one track and music and/or sound effects on other tracks. You can’t send it to a client until you render (mix down) the project into one audio file (mp3 , wav etc.).
That final audio file is what I then open in Audition. It’s where I put on the headphones and really listen to the details, doing things like clipping out odd mouth sounds like breathing or what I call “saliva clicking” (don’t dwell too much on that last one:)), editing and eliminating offending p-pops, fading in and out on specific phrases, evening out overall volume with compression, and controlling maximum volume with normalization.
Finally I can save the audio as any number of different formats quickly and easily. It’s polishing and finalizing the audio before it goes to a client or onto a CD or some other sale-able form. Some of these things can be done in Reaper, but I find them faster and easier in Audition. In the end though, whether you use an external editor comes down to need and personal preference.
The software mentioned in this article, though there are dozens of others out there, should be enough to do anything you need to do from recording, mixing, editing and final mastering. Join us for the final installment of this series on building your home recording studio when we’ll talk about the accessories such as mic stands, pop filters, shock mounts, speakers and headphones.
Cheers!
Ken
I have been using Wavepad’s free version and find the noise reduction better than Audacity’s. It doesn’t add the distortion that Audacity does on my simple system – USB mic to netbook. I also like that the options I use most are displayed on a side panel. Great stuff by the way!
Thanks Michael! I have Wavepad but have not put it through the ringer yet. I am going to test the noise reduction tool against Adobe Audition’s and against Reaper’s ReaFIR tool based on your update:).
Thanks again!
Ken
Silence is the prime need for a studio so I think your recommended ‘noise reduction’ device really works to prevent the sound of outside. Thanks for the cooperation.
winners of nbc voice
When you completed your song recording then you need to edit it too. For this purpose you need software by using that you can finish your song’s editing.
Absolutely! I use Adobe Audition for that, which has some pretty excellent mastering tools.
Have you heard of mixcraft 6, It is a med level DAW software. cost is $75.00. It will work without a interface and make cd quality recordings. If your soundcard and preamp are good enough. I used a small Behringer mixer. to record this live.
https://soundcloud.com/thomas-belcher/mix-6d-mp3
Tom,
Absolutely. I’ve definitely heard of Mixcraft and even called it the best tracking and mixing software for ease of use and cost in our article here: https://www.homebrewaudio.com/best-home-recording-studio-software/
I have been using Ableton 11 Lite. It comes as a free license when you buy FocusRite products. I did my last full album, and 2 EPs using Ableton and a Focusrite 2i2. IMO, it’s worth the extra 30-40 bucks to buy the 2i2 over the Solo so you can record guitar and vocal simultaneously.
Good to know you were able to use it in that way. I have done the same, but still prefer to do one track at a time to prevent bleeding of voice into guitar mic and vice versa.